Korg NanoKntrl2 DIY Overlays For Everyone
For a long time I’ve been looking for a way to make sense of the Korg NanoKntrl2 cheap USB/Midi controller in the dark of a performance. I’ve got a long standing love/hate relationship with these little bastards. I love them because they are inexpensive, small, and very easy to program. I hate them because they are not proper midi controllers. They are USB/Midi controllers… this means that without a computer to operate as a host (to tell it what to do) then it isn’t actually anything but a piece of plastic.
Enter the Kenton Midi USB Host MkII, a semi-expensive little box which has saved my life. The Midi/USB Host acts as the Midi brain for any USB/Midi device, and allows us to connect them directly via 5 pin midi din to whatever needs connecting. So we can use these quixotic little USB devices with anything, but at a fairly dear price. Yes, other new USB/Midi host boxes have come out in the last couple years, and they are all much less expensive than the Kenton. I haven’t tried any of those, so I don’t know how well they work. They’re probably fine.
PROCESS
I connect the NanoKntrl2 between devices to provide additional control over them. So for example, in a live performance I use one of them as a mixer and real time, one knob per function editor for the Elektron Octatrack. This adds the ability to quickly make changes to many things at a glance. No more shift keys, no more needing to remember where I am, or what I’m supposed to remember. Just move the knob, push the button. Yes…
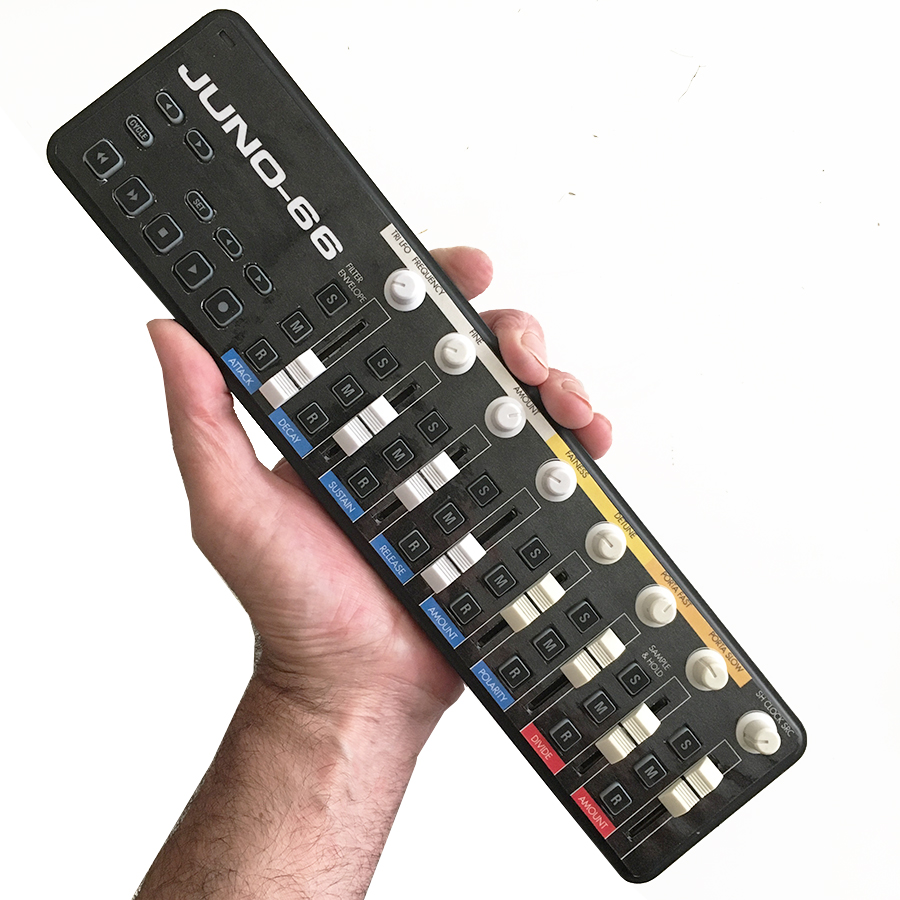
I do the same with the Tubbutec midi upgrades for the Juno-60 (Juno-66), and the Korg Mono/Poly (Mody/Poly). This adds a whole layer of function in real time to my synths. These end up being great, and if I were willing to spring for a few of the USB/MIDI host boxes I could make use of a few of them at once, but apparently I would rather just be sad that modern midi controllers aren’t really “midi controllers” but rather they are computer peripherals and while they should have at least a 3.5mm midi breakout jack on them (or maybe an actual midi jack!) so I only have the one…
This leads me to needing to know what’s what on the NanoKntrl2 in the middle of a performance. In the dark it’s hard to know what you’re doing, and one develops a sort of innate sense… looking into screens sucks, because when you look away you’ve been blinded – screens in general suck because they are light… and I did replace the LED’s on my JU-06 from red to white so that I have light for all three of the boutiques I use in a live set, but prefer the dark. I want to hear, not necessarily see (or be seen.) This may be different from how you feel, and that’s fine, but the issue is that when using the same device for different purposes once can easily become confused.
ENTER THE OVERLAY
I’m pretty handy with an X-Acto knife, and so I started printing out and cutting overlays with paper. They look ok, and they fit alright, but they don’t last much longer than one show. That’s bad. I think things being more durable is a better idea, and so I started looking into how to make these in a way which might last.
First I searched locally, asking printers and vinyl cutters how this might be done. The response was basically $175 each, or lie. Unless I was going to make 10,000 of them the cost per overlay locally was $175 each. The Korg NanoKntrl2 is barely $45… not worth it. The alternative suggestion was to lie to off shore polycrbonate overlay printers/cutters and make out like I was gonna make millions of them for the rest of my life, BUT, I need a sample… That was hilarious, but I would never do that. So no.
A lot of people suggested that I might want to just make stickers. Vinyl stickers are an interesting idea, right. Vinyl is durable, and one can cut the various colors out, and then lay them all down onto some sort of paper and then create an overlay from these thin stickers. Might work, but also, unless you have a vinyl cutting printer of your own, this starts to get expensive again by the time we’re done.
Along came Ean. My man Ean in NY suggested that I laminate the paper overlays which I’d been struggling with, and then cut them out and he was sure they would last, and do a good job. I had my doubts… “doesn’t lamination sound like it’s evil? Like maybe it will be so thick that the end result will be too thick to fit, and too hard to cut?” I asked Ean. He was sure this would work. So sure he laminated a couple of my designs, and sent them to me. I cut them out with my X-acto, and they do indeed fit great, and seem to be the perfect solution. I love it when I’m wrong… it seems to be the only time I really learn. Thanks to Ean for being clear, persistent and for being willing to explore this with me.
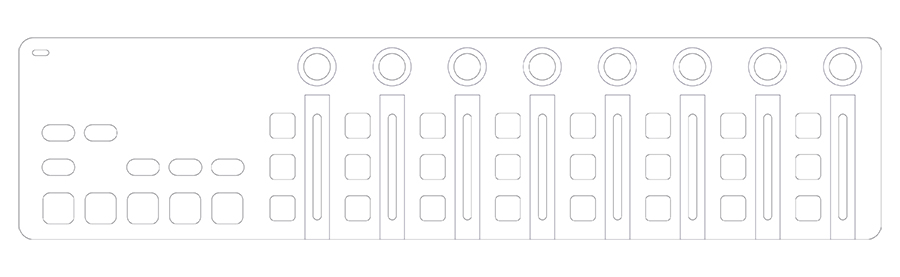
1. Download the template file from here or make your own
2. Modify my designs to suit your needs, or start from scratch and make it the way you like it
3. Print your file – Note that the paper size is 8.5 x 14 (US Legal) – this is important, don’t “scale to fit” this file. You need it to be actual size so that once it’s cut out it will still fit your controller.
4. CUT 1 – Cut as much of the printed design out as possible before you laminate.
5. LAMINATE – Use the thinnest, and most clear lamination film available. You can do this at a service bureau, or with a friend who works somewhere they have a lamination machine. It’s fast, and it’s fun. So weird.
6. CUT 2 – Now that the design is laminated, it’s time to cut it out all over again. Cut carefully, with a rule, and take your time.
7. Enjoy – That’s it. Now remove the caps and knobs from the NanoKntrl2, lay the overlay down and replace the caps and knobs. So pretty!
KORG NANOKNTRL2 (Nano Kontrol 2) TEMPLATE FILE
DOWNLOAD
Adobe PDF Document suitable for import into photo editor, or illustration application
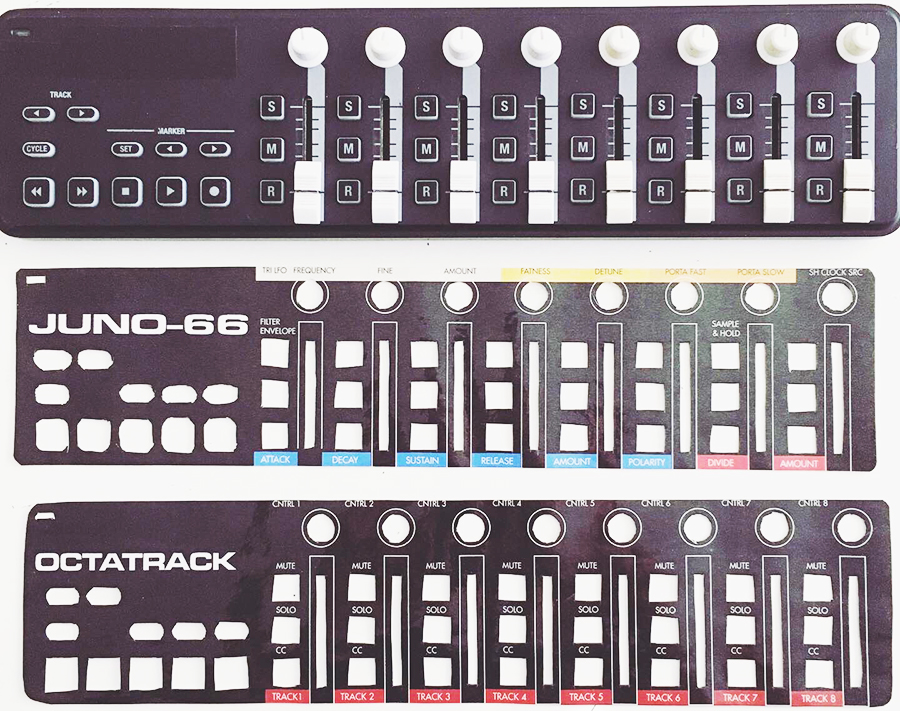
ELEKTRON OCTATRACK OVERLAY EXAMPLE
DOWNLOAD
Adobe PDF Document suitable for import into photo editor, or illustration application
TUBBUTEC JUNO-66 OVERLAY EXAMPLE
DOWNLOAD
Adobe PDF Document suitable for import into photo editor, or illustration application
TUBBUTEC MODY/POLY OVERLAY EXAMPLE
DOWNLOAD
Adobe PDF Document suitable for import into photo editor, or illustration application
UPDATE
Following this exploration, I had a discussion with someone from Kenton Electronics and we talked about something I did not know:
You can connect up to four USB/Midi devices via a USB Hub (preferably powered) into a single Kenton Midi USB Host converter box, and they will then transmit and receive midi data into any given system.
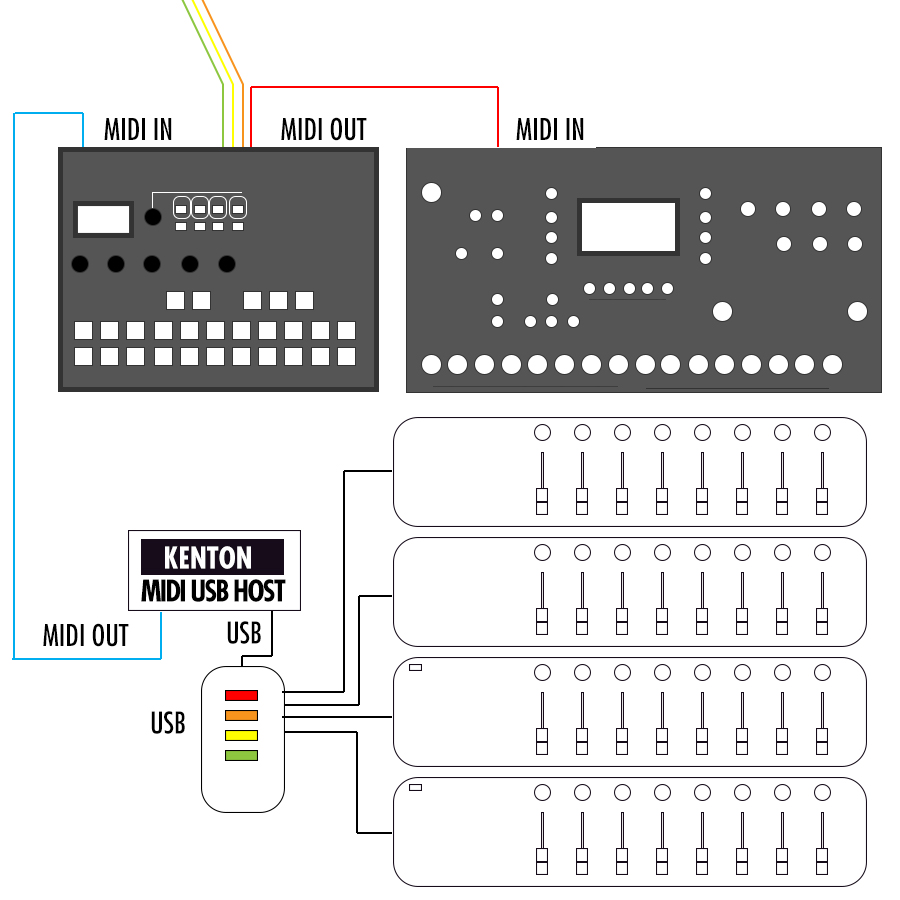
I ran into my studio, and test this out, and I am delighted to report back that it actually works. Not only am I able to skip the MIDI Merge box by connecting the Kenton converter into my input, but I am also potentially able to connect up to 4 Korg NanoKntrl2 (or any other such USB Midi controller boxes) into my system, and provided they are appropriately channelized, enjoy one knob per function control over anything without a computer involved at all. This is fantastic news, and it further galvanizes my affection for Kenton Electronics in the UK. However, I would still like an overlay for each of my little USB controllers so I can forget where I am, get totally lost in a performance, and still know what knob does what, and which device it’s connected to. The struggle is real.